News Article
Step 1. Create Page
At the top of the screen, select Manage and then select the Content dropdown menu. From there, open the Add Content drop down and select News Story.
Step 2. Page Header
Begin by creating a Title to name the article. In the Hero Image section at the top, select a header or upload an image. The optional Article Title field provides an override: any text entered in that field replaces the default Title on the live page. Only one title—either the Article Title or the original Title—will appear at the top. An optional Subtitle field is located directly below.
Step 3. Byline
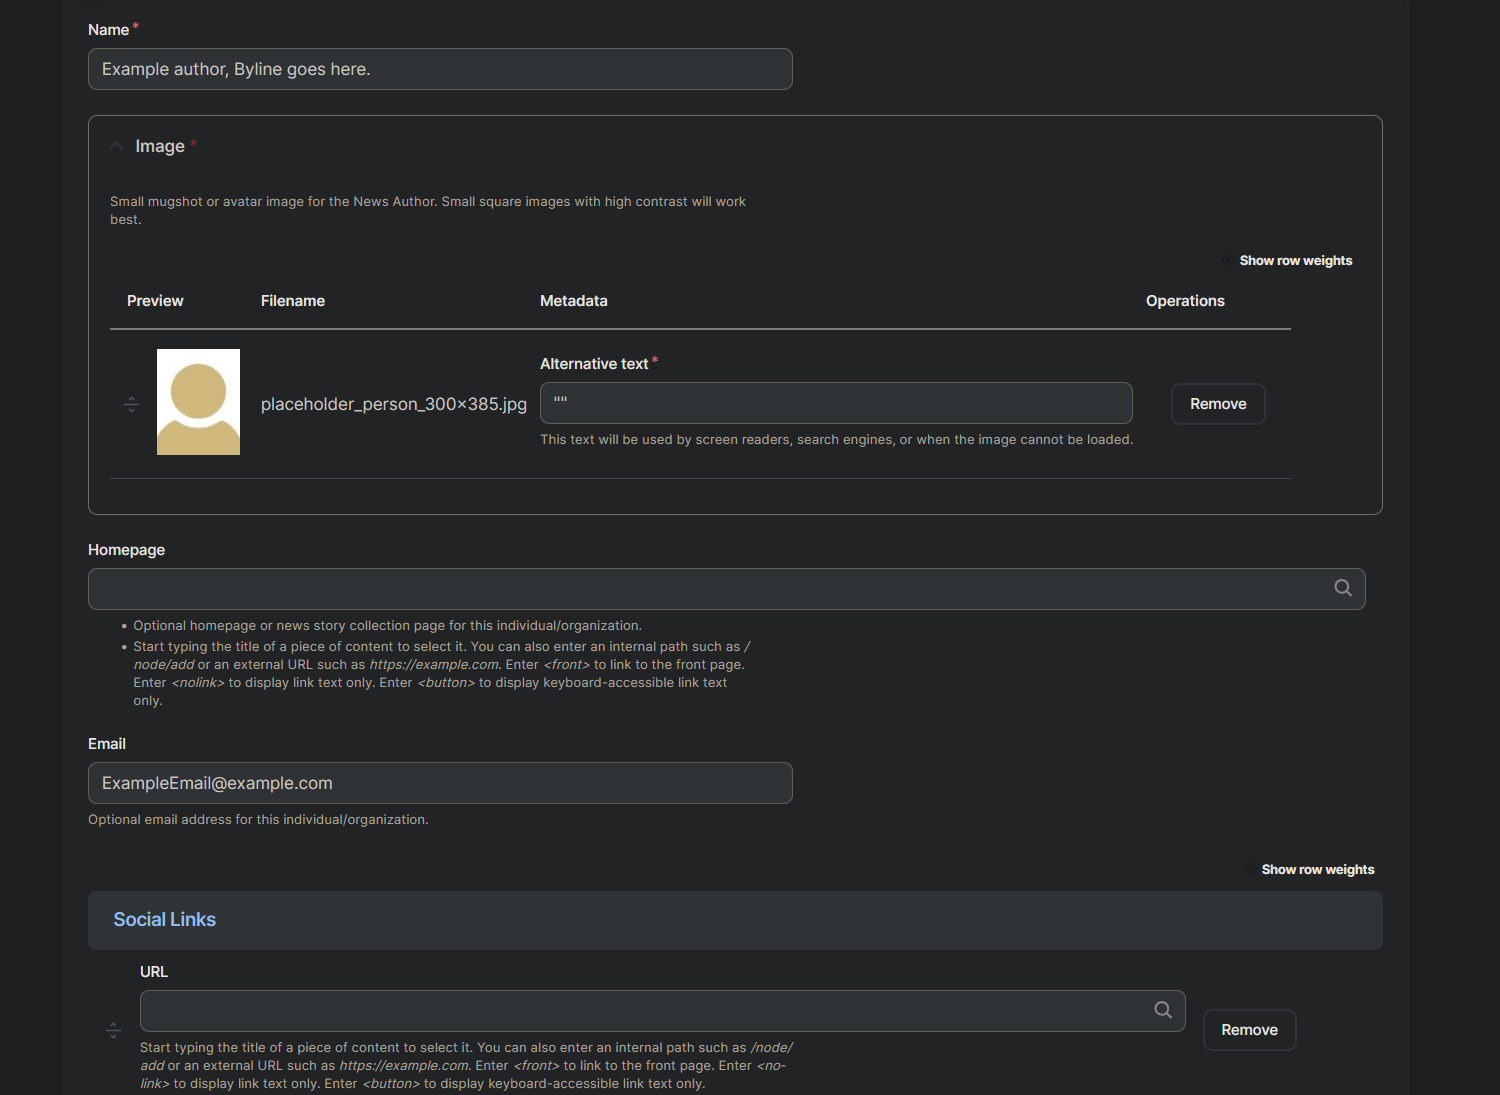
Below the Step 2 content, there is the Byline section. First, click the Media Add Page link to open the Byline form. At the top, enter the author’s name (required). Next, upload or select an author image or placeholder (required) and be sure to add alt text for screen-reader accessibility. Below the image, the author’s organization homepage URL, email address (also optional), and any social-media links may be entered.
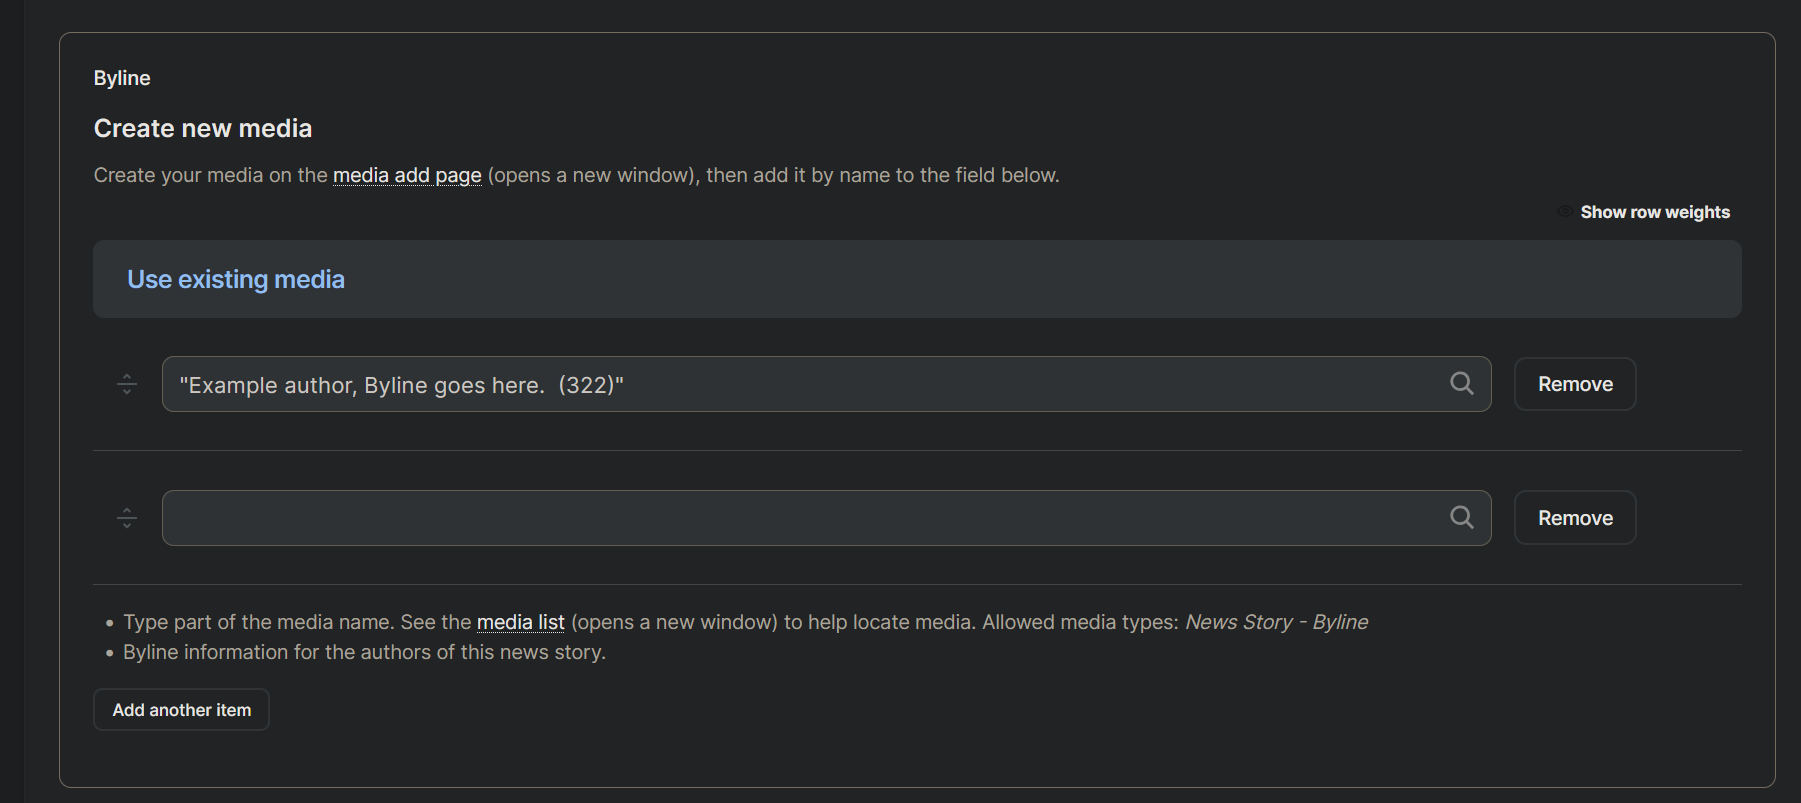
After the Byline is created, it can be called by typing the Byline Name into the Use existing media box. This step can be repeated if more than one author will be credited.
Step 4. Date, Abstract, and Content
Below the byline there is the option to add a publication date (in MM/DD/YYYY format) and an abstract. Both fields are optional.
Following that, the Content Row section appears—this area is dedicated to constructing the article. Each Content Row comprises three elements:
Section Title (optional): Serves as a heading for the content segment.
Copy: Provides a main text field capable of bolding, italicizing, inserting hyperlinks, embedding media, and more.
Media: The Media Add Page link initiates an image upload (required) and prompts entry of the image’s name (required), with additional optional fields for author and caption.
An additional section—complete with its own title, copy, and media—can be inserted by selecting the Add News Story — Content Section button beneath the media; a new, blank Content Row will then be generated.
Step 5. Additional Information and Tags
The Additional Information and Tags sections follow.
Additional Information accepts one or more related-content links—each entry requires only a URL (internal or external) and a title.
Tags groups similar articles on the site by simple text strings, so entering each tag word is sufficient.
Additional entries for either section can be created by pressing the “Add another item” button beneath that section.
Step 6. Save and Publish
It's time to save and publish the content. A revision log message should be added (in the right-hand pane) to document the changes. Next, set the Change to: dropdown to Published. Finally, click the Save button (top left) to commit the update—this action publishes the article and returns to the frontend view seen by visitors. Until Save is pressed, the article remains unpublished. To inspect the page’s appearance without publishing, use the Preview button, which also navigates to the frontend but leaves all changes in draft form.


