Department Directory
Step 1: Creating the Directory
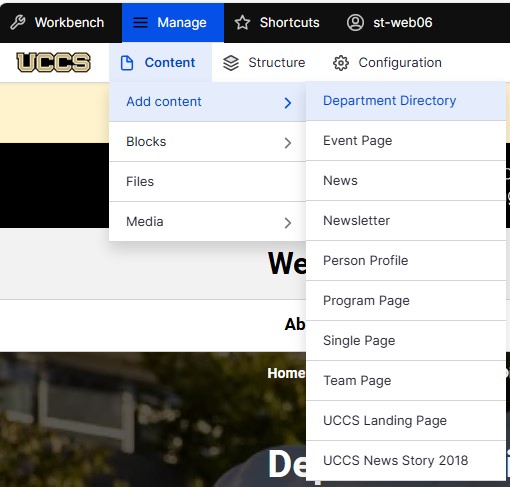
At the top of the screen, select Manage and then select the Content dropdown menu. From there, open the Add Content drop down and select Department Directory. This will create a new Department Directory page.
Step 2: Titling the Page
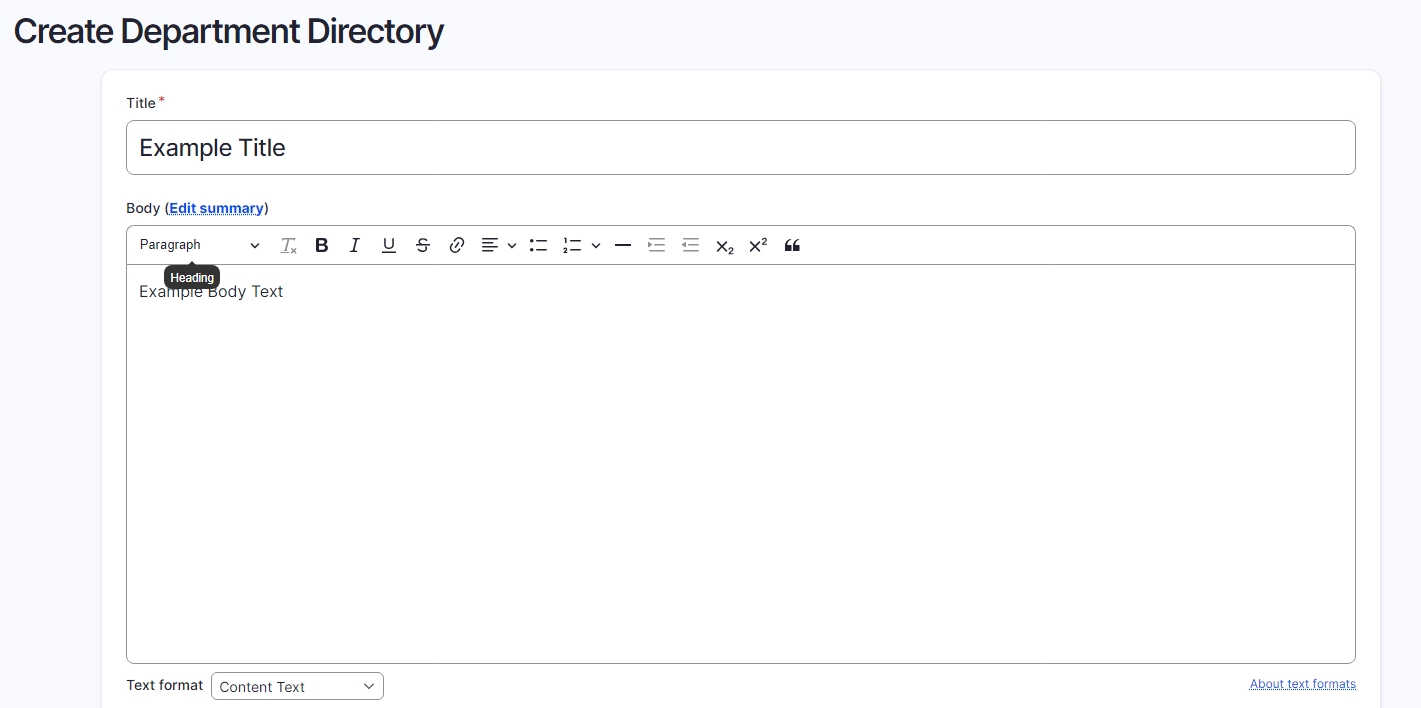
Create a Title, and add body text into the Body text box, only a title is required.
Step 3: Adding Staff Pages
- Scroll down to the Staff Page.
- You must have at least one Team Page created in order to create a Department Directory.
- To see how to create a Team Page, please visit the tutorial page.
- Once it has been created, search the title in the Staff Page text box and select the desired page.
- To add more pages, select Add another item, to remove a page select Remove.
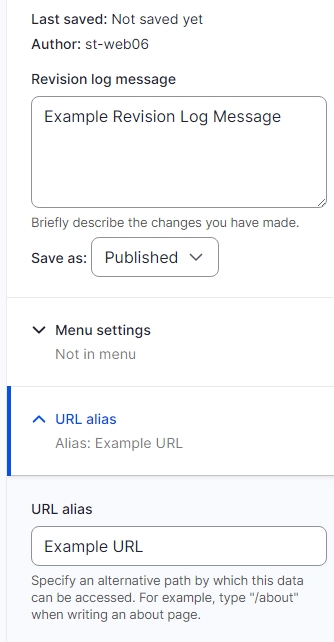
- Once finished, select Save to view your page. Make sure to add text to the Revision log message to explain any changes that you have made.
- Once everything has been added, select the blue Save button at the top left of the screen.
Page Editing
On the right-hand side of the screen, there are tools that will allow you to publish and edit the URL and menu, for a full tutorial see here. To publish the page, select the Save as: dropdown menu and select Publish. To change the URL (the link to the page) select the URL alias dropdown and deselect Generate automatic URL alias. You can then create your own URL for that page, for a full tutorial see here.


