Program Page
Step 1: Add New Department Directory
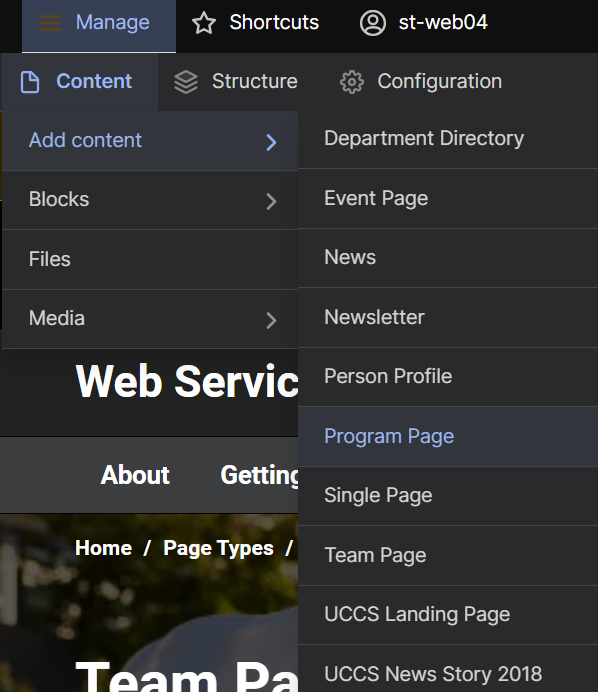
At the top of the screen, select Manage and then select the Content dropdown menu. From there, open the Add Content drop down and select Program Page.
Step 2: Page Settings
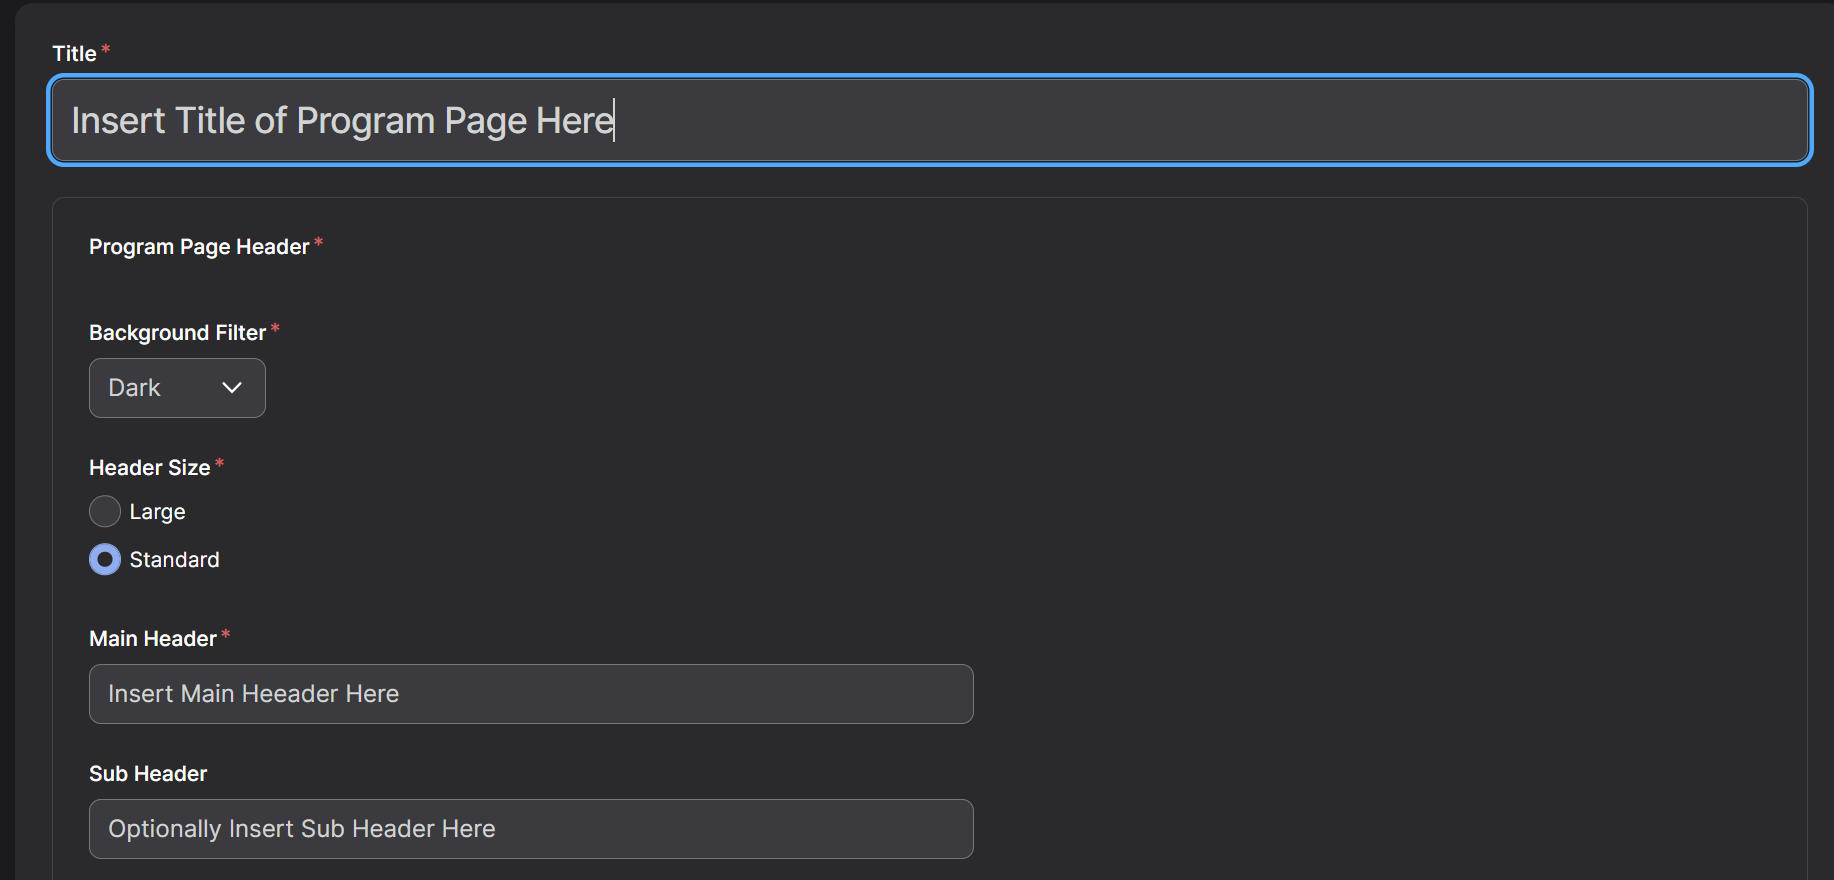
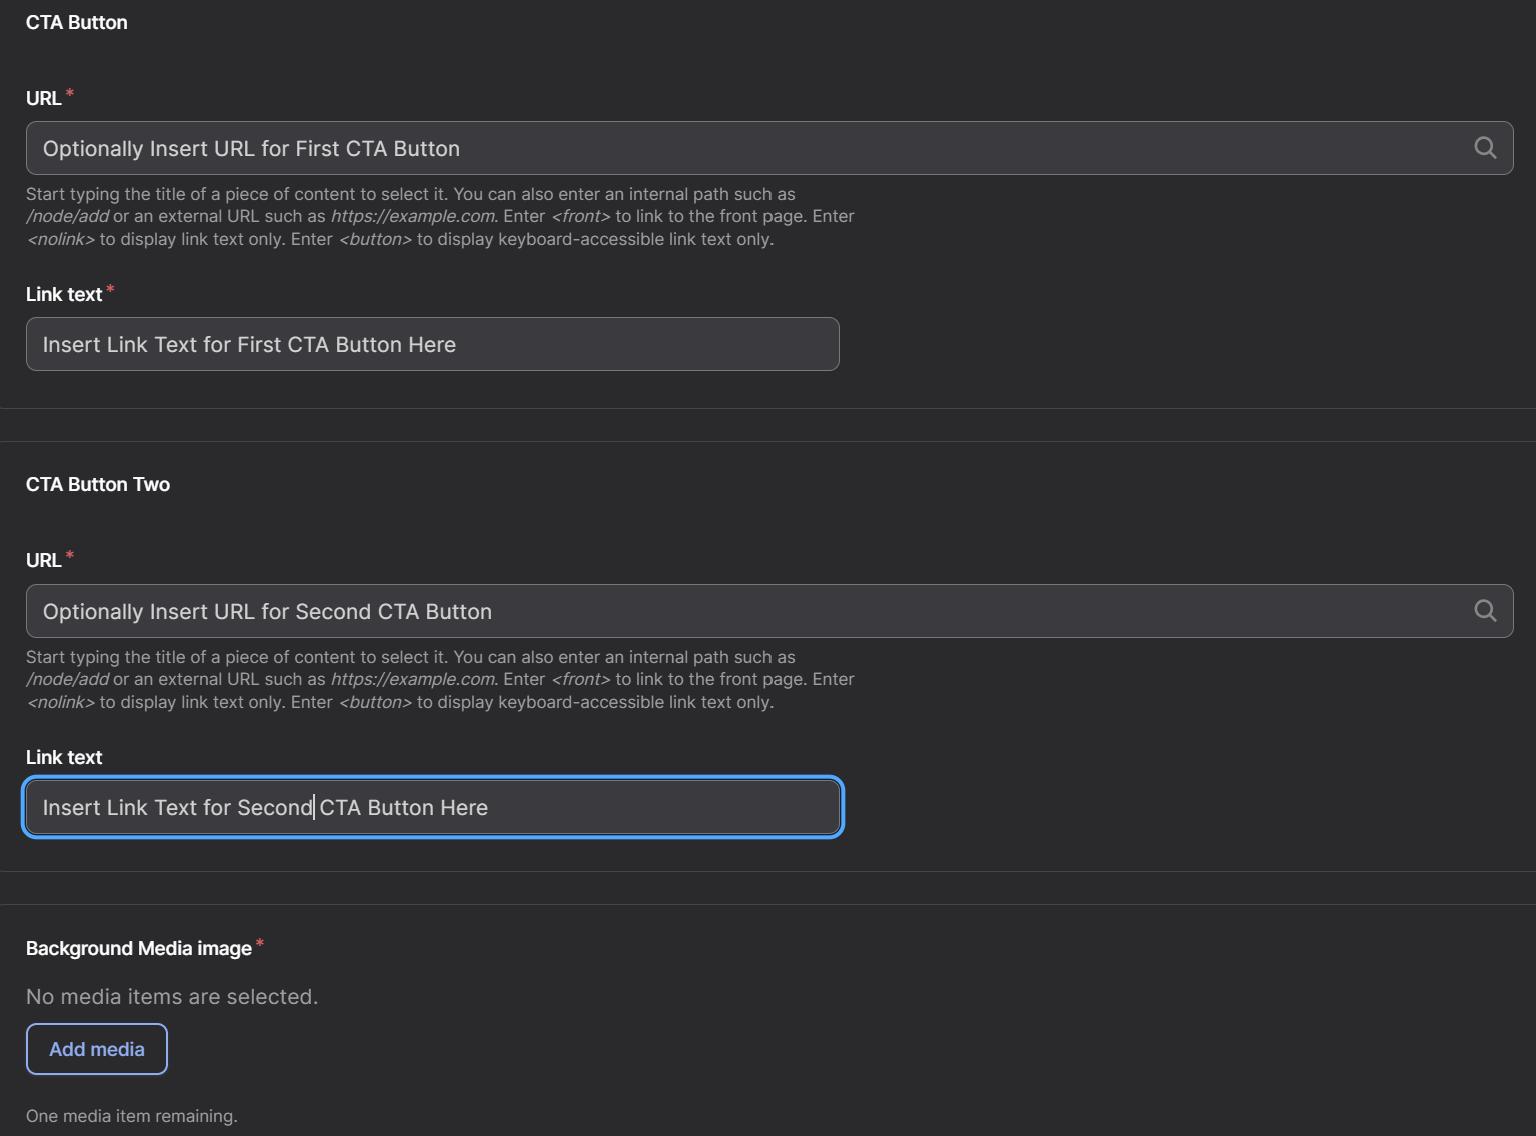
Create a Title which is the program of the page. Go to the Program Page Header section, and select a Background Filter, a Header Size and a Main Header. Two CTA Buttons can also be added which are buttons that link to other pages. To do this, insert the URL (link of the page) into the URL box, and insert Link Text. A Background Image is also required which can be added by selecting Add media and selecting your image. The image must be uploaded to Drupal, if it has not you can follow the tutorial here.
Step 3: Program Information
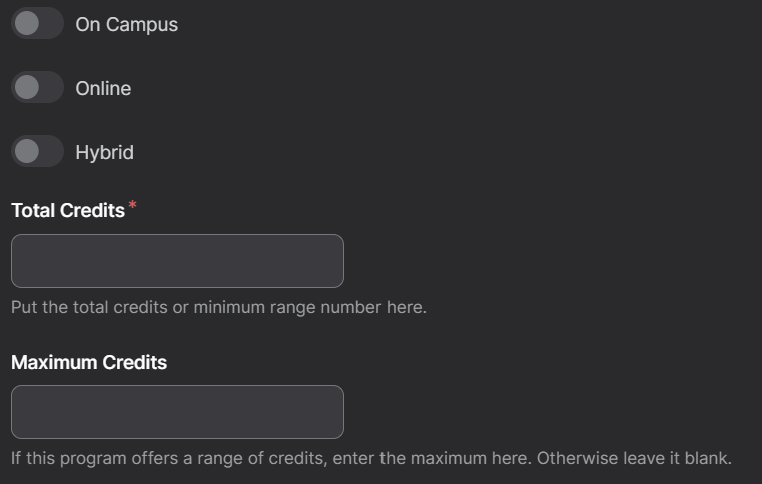
Select whether the course will be On Campus, Online, or Hybrid. Then, insert the Total Credits and Maximum Credits of the course.
Step 4: About the Program
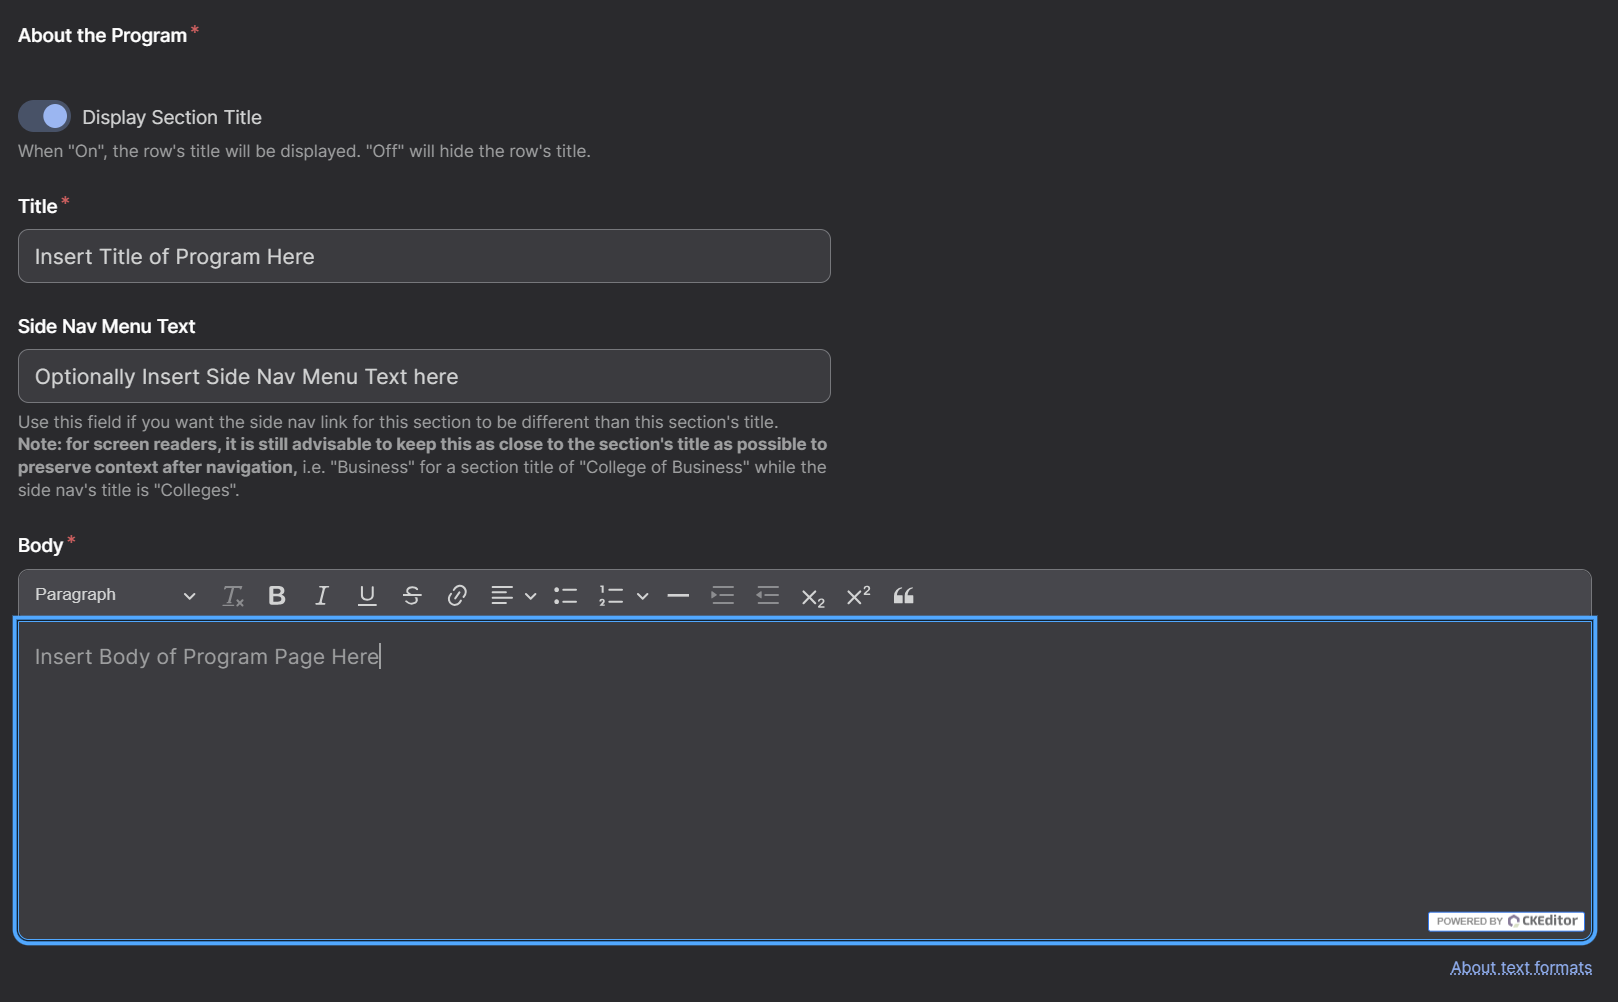
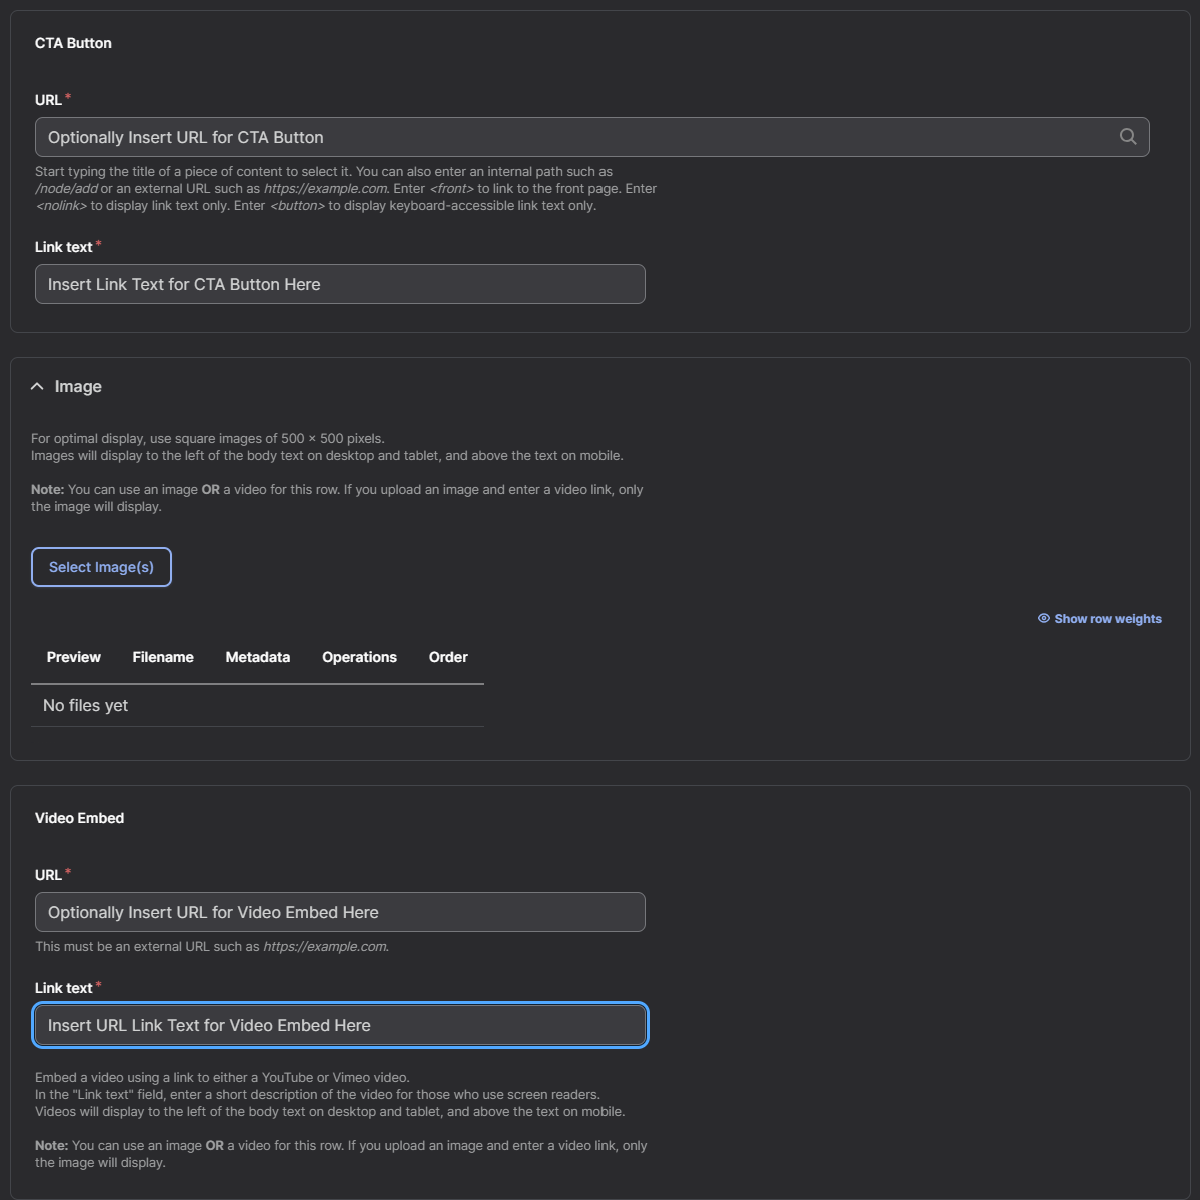
This section is used to explain details about the program. Insert a Title and text into the Body section. If the Title is too long, use the Side Nav Menu Text to display a shortened title on the side of the page. These are the only required fields for this section, but more can be added. A CTA Button or Video Embed can be added by inserting the URL of the video/website and pasting it into the URL box and inserting Link Text. An image can also be uploaded by selecting Select Image(s) and selecting the image to insert. The image must be uploaded to Drupal before use, to see a tutorial view here.
Step 5: Focus of Study
Use this section to explain in detail the focus of study. This section is the exact same as the About the Program section in terms of editing.
(Please Refer to About the Program Tutorial Section, aka Part 3 for Screenshot Guide)
Step 6: Program Requirements
Use this section to explain in detail the Program Requirements. This section is the exact same as the About the Program section in terms of editing.
(Please Refer to About the Program Tutorial Section, aka Part 3 for Screenshot Guide)
Step 7: Specialization Track Options
This section is optional and is used to explain any Specialization Track Options for the program. This section is the exact same as the About the Program section in terms of editing.
(Please Refer to About the Program Tutorial Section, aka Part 3 for Screenshot Guide)
Step 8: Program Coursework
Use this section to explain in detail the Program Coursework. This section is the exact same as the About the Program section in terms of editing.
(Please Refer to About the Program Tutorial Section, aka Part 3 for Screenshot Guide)
Step 9: Additional Menu Items
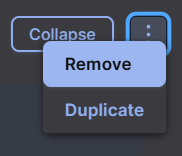
If more Menu Items are required, go to the Additional Menu Items and go to the Content Section. This section is optional, and all menus can be removed by selection the Three Dots next to the collapse button and selecting Remove. The Side Nav Items are all the same as the About the Program in terms of editing. To add a new menu item select Add Side Nav Item at the bottom.
(Please Refer to About the Program Tutorial Section, aka Part 3 for Screenshot Guide)
Step 10: Saving the Page
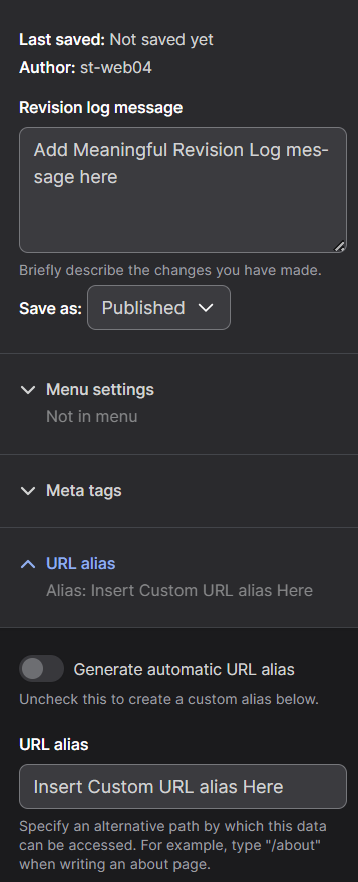
On the right-hand side in the menu there are several options for your page. Most importantly, select the Save as: dropdown and select Published which will publish your page. Additionally the URL can be changed by selecting the URL alias section. It is also important to write any changes made in the Revision log message box. Once all content has been added select the Save button and your page is now published.
